Audi Multi-Function Steering Wheel Retrofit
Wednesday, April 27, 2011
2005.5+ (B7) Multi-Function Steering Wheel into a 2002 (B6) Audi A4.
I finally had some time to put all my pictures, videos, thoughts, and everything else together into a guide that shows a complete install of a 2005.5+ (B7) Multi-Function Steering Wheel into a 2002 (B6) Audi A4.
Thanks to everyone else who did all the research before me and helped along the way.
Before getting into the details of what's needed and everything else...I want to talk a little about the setup...
I already had an RNS-E and Bluetooth phone module installed and the MFSW was really the missing piece. This is really a must have for this system and brings everything together. It makes everything work so much more smoothly, especially the Bluetooth system. Items like the phone's internal phonebook are much easier to access, as are dialing regular numbers and receiving calls.
A couple examples describing before and after scenarios...
Before, let's say you wanted to dial your friend Tom from the cell phone's phonebook.
You press TEL on the RNS-E, then press Memory, scroll down to "Phonebook", press the large knob, then scroll thru unitl you reach the name Tom (which could take quite a while since the system does not let you start from Z to A, only A to Z), then pressed Dial.
Now, you press Mode which brings you directly into the cell phone's phone book and is displayed on the DIS, then you can scroll backwards (Z to A or A to Z is allowed) with the thumb roller to Tom, and press the thumb roller once and it dials. Two buttons, and two presses to complete the whole thing. Much more efficient, faster, and safer while driving.
Another example is using the old Directory and the new internal Phonebook for your quick dials.
Previously, I had my most dialed numbers set up under Directory in the Memory menu of the TEL function (Mom, Dad, Sister, Girlfriend, Office, etc).
To call one of these numbers, it was the same routine as the Phonebook, except going into Directory in the Memory menu instead of Phonebook.
Now, with the MFSW, one press of the Voice button is all that's needed (after you setup the names in the internal phonebook, same as needed to be done with the directory menu). The rest you speak the command...all while keeping your eyes on the road. See the video below for an example.
These three videos show the system in action, including a video showing a very cool feature where the A/C speed automatically turns to level 2 while a voice command is given, then goes back to normal after the command is received and executed.
http://www.youtube.com/watch?v=GZ9smLRpod0
http://www.youtube.com/watch?v=YZvmgSJ4wNo
http://www.youtube.com/watch?v=MxW-eoTRIpE
Functionality


Button: Left Thumb Roller
Source: Radio
Roll Up/Down - Scrolls through available radio station/Presets
Press - Search for radio stations
Source: SD/CD
Roll Up/Down - Scrolls through song list/tracks
Press - Fast forward song/track
Source: Bluetooth Telephone
Roll Up/Down - Scrolls through cell phone's phonebook
Press - Dials number currently displayed in DIS
Button: Right Thumb Roller
Source: All
Roll Up/Down - Volume up/down (radio, SD/CD, telephone volume, navigation volume)
Press - Repeats last navigation direction given
Button: Mode
Source: All
Press - Switches between audio source controls and cell phone's phonebook
Button: Speak
Source: All
Press - Voice recognition control
Available options include:
Dial number
Redial
Select name
Store/Delete name
Play/Detele phonebook
Install
Parts Needed
Multi-Function Steering Wheel from Audi A4, A3, or A6 + matching airbag
eBay is a good source for steering wheels or www.airbagsforsale.com I was able to purchase the steering wheel and airbag with correct harness for ~$649 shipped.
Control Module - 8E0-953-549-R www.autopartsnationwide.com $209.49
S/C Ring - 4E0-953-541-B www.autopartsnationswide.com $323.21
4 Pin Connector - 4E0-972-133 www.autopartsnationswide.com $4.58
Airbag Wiring Harness - 4F0 971 589 A (Only required if not supplied with airbag) - www.autopartsnationswide.com $36.46
Tools Needed
Torx T8 screwdriver (Sears sells the one you need, 2.5" long)
Torx T27 screwdriver
Torx socket T55
Allen Hex socket 4mm
10mm wrench
Small flat screwdriver
VAG-COM
The first step to the install is to get the soft coding of the ABS/ESP module. This must be done first since after this step, the battery will be disconnected and the code will not be available.
To get the code, connect the VAG-COM and read the ABS mdoule soft code (03-ABS Brakes) and note it down. On my car, the soft code was 04275.
Old steering wheel.


Disconnect the battery using the 10mm wrench.
Begin by adjusting the steering wheel to it's lowest and nearest position (pulled toward you).
Turn the steering wheel to gain access to the two screws on the rear of the steering wheel which hold down the airbag.


Once the airbag is loose, unplug the connector from the back of the airbag. The yellow tab must be pulled out first, then the blue connector itself.


Unplug the yellow connector from the SC Ring.
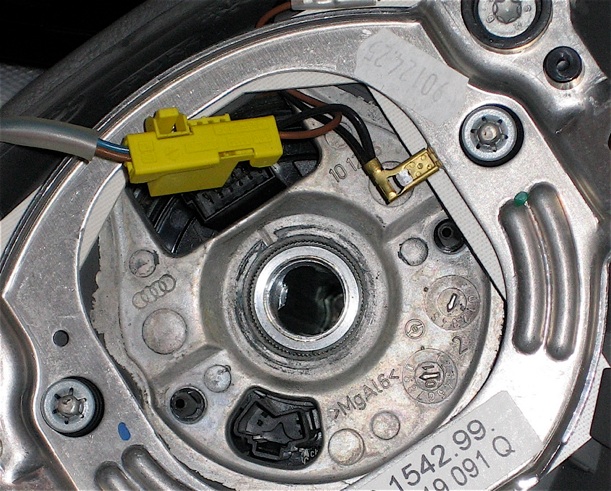


Make sure the steering wheel is locked into place.
Using the Torx T55, remove the bolt holding the steering wheel into place. and using a marker, make a mark on the steering column spline to line up with the new steering wheel later.


Pull off steering wheel and locate the two holes on the bottom of the steering wheel column cover.
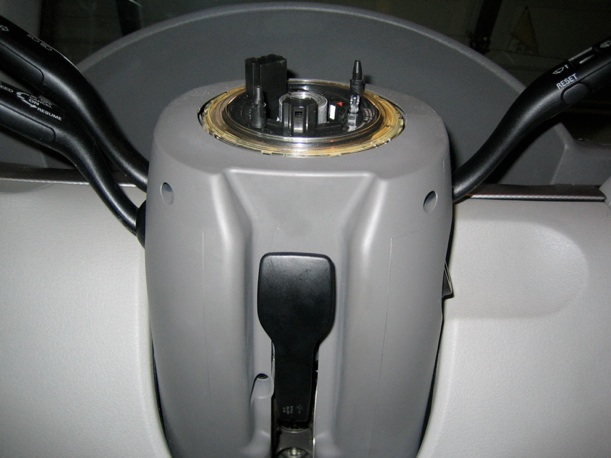


Using the Torx T27 screwdriver, remove both screws.


Locate the screw under the steering column cover and remove using the Allen Hex 4mm.
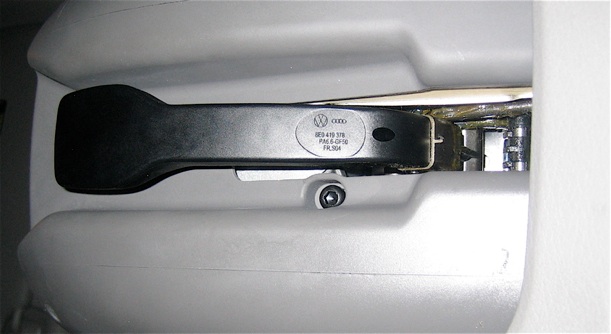


Pull apart the top and bottom of the covers. Using a small flat screwdriver, unclip the three plastic tabs holding the SC ring in place. These are the only things holding the SC ring in place.


Pull forward on the SC Ring and unplug the yellow connector in the back.


After removal of the SC Ring, the blinker, cruise control, and wiper stalks must be removed. Using the T8 Torx screwdriver, remove the five screws which hold down all three stalks.
The blinker has two screws on the right edge, the cruise control has one screw at the top right, and the wiper stalk has two screws on the left edge.
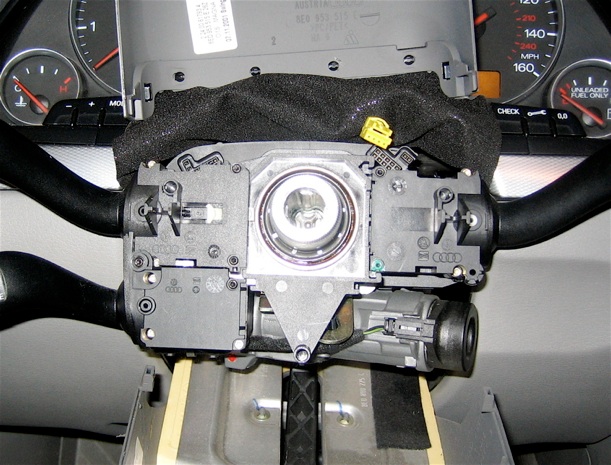


Locate the screw at the bottom and loosen using the 4mm Allen Hex bit. (It does not need to be taken out completely, just loosened enough).


Pull out on all the stalks and they will remove as a unit.
With the stalks out of the way, unplug the control module from the back.
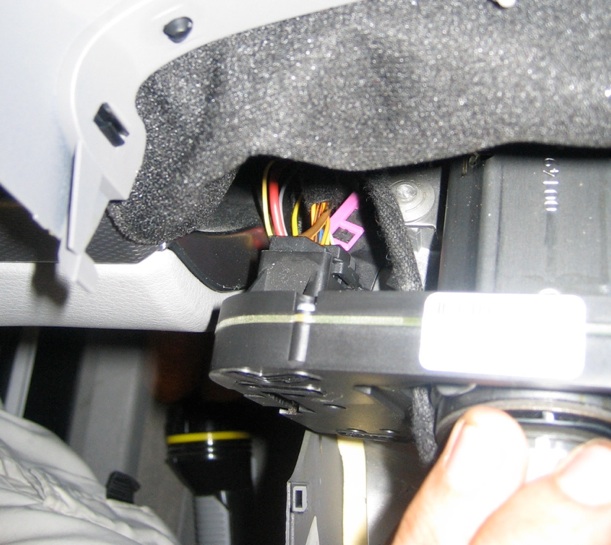


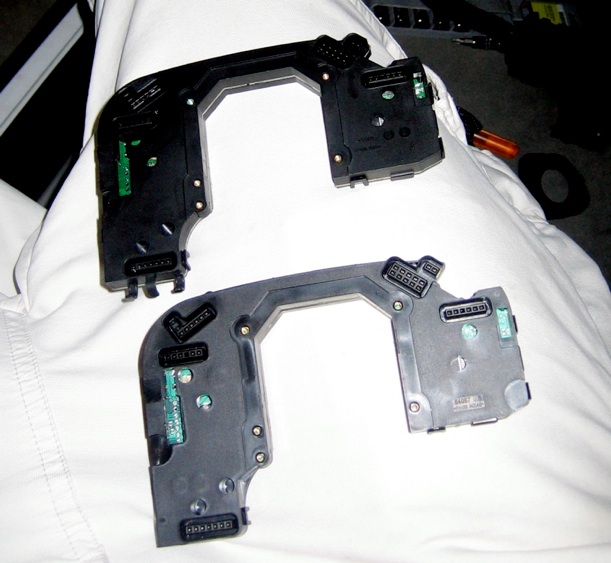
Here you have the new and old control modules, they look identical so pay attention to the part number (will be on a sticker on the top edge) to make sure you re-install the correct one. Also note the location of the five screws that were removed earlier from the blinker/cruise/wiper stalks.


Before beginning installation of the new parts, locate the yellow connector that was plugged into the back of the SC Ring. The connector is different and must be replaced with the new one (4E0-972-133).
The old connector plug is made up of two parts, a top part which slides in/out to hold the pins in place and a bottom part that houses the pins.
Pay close attention to which wire goes to which pin and make sure they are installed in the same order in the new connector.
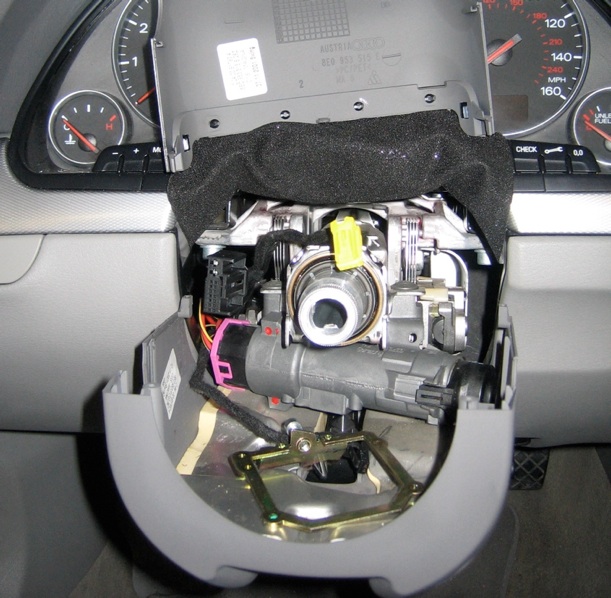


Here is the new (left) and old (right) SC Ring. You can see the difference in the connector plug (by my thumb and fingers). Also note that the new SC Ring has pins in the L shaped connector where as the old SC Ring was empty here.


That's it! :D Well...at least for the de-installation of everything. Re-install everything using the new parts in reverse order. Everything is plug and play from here on...sort of.
When installing the new airbag, you may want to re-wire the plug. I did not do this and have had no problems with any MIL or fault codes for the airbag, but since the newer airbags are dual stage and the older ones are single stage...it's probably safe to assume that only one state will function in case of an accident, so it's probably best to re-wire the connector. No one, as far as I know, has tested either scenario. The airbag might work ok with a single stage being activated, or it might not work at all. Re-wiring the connector to send a signal to both airbags might activate both airbags...or it might not activate either. Either way, do this part at your own risk, I am not responsible for what you do with your car. :)
If you choose to re-wire the connector, here are the instructions per Proxus.


Connect the battery and start up the car!
Software Coding
There are several things to code and faults to clear after the hardware install is complete. The ABS/EPS module must be recoded, the Airbag MIL fault must be cleared, and the new steering wheel may need to be recoded. I say "may need to be" because mine coded itself to the correct settings after install.
First let's start with the ABS/ESP module. Connect the VAG-COM to your car and access the 03-ABS module. Follow the instructions linked here to calibrate the Steering Angle Sensor and clear the ABS and Brake lights.
http://wiki.ross-tech.com/index.php/...28Bosch_5.7%29
For my vehicle, 2002 Audi A4 non-Quattro and 5 speed manual transmission, I used login code 09575. I wasn't sure about 0x?xx Brakes so I went through all the numbers until it finally accepted one. I don't think any damage can be done, if the login code isn't correct, it just simply won't work and you can try again.
After logging in, go to Coding and type in the code that you previously checked before the install...or figure out the code again, it's pretty simple, again the only possible unknown is the 0x?xx Brakes, which will be the same as the brakes you chose for the Login code.
The rest of the calibration is performed per the instructions in the link, including the logging code given (40168).
Next, you may have to recode the steering wheel, RNS-E and DIS, depending on your setup.
For the steering wheel coding, access #16 and follow this link: http://wiki.ross-tech.com/index.php/...Steering_Wheel
The options are also given in VAG-COM as a pop-up when you go to coding.
As an example, my car is coded 04041
Do the same for the RNS-E, #37 and http://wiki.ross-tech.com/index.php/...NS-E%29#Coding
My car is coded 0301715
For the DIS, access #17 and go to Adaptation Channgle 62. Add 2 to the figure to allow telephone information to be shown on the DIS.
Finally, if you have the airbag light on, go to #15 and Fault Codes, then clear the code.
Done! It's a bit of a long process, and quite expensive, but definitely worth doing if you have the RNS-E and Bluetooth modules installed.

All modifications and changes are done at your own risk. This site in no way is responsible for any modifications performed on your vehicle. Please check with your Audi dealer as certain modification could void your factory warranty.
Created by Valentin Berechet using iWeb. © 2011.